

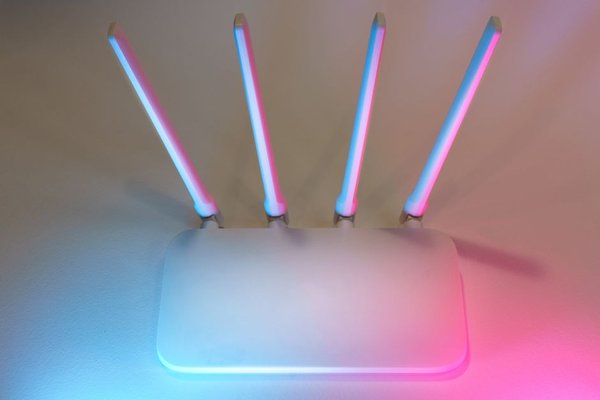
Setting up a new router can feel intimidating when the box has unfamiliar ports, flashing lights, and a sticker full of numbers. Fortunately, most home networks follow the same sequence: connect the internet source, open the setup screen, create secure Wi-Fi, and check everything works. This guide explains how to set up a wireless router without assuming you already know networking terms, including the small decisions that prevent problems later.
Before You Start: Identify Your Equipment
First, identify what connects your home to your internet service provider (ISP). Cable or DSL service may use a modem, while fibre commonly uses an optical network terminal (ONT). Some ISP devices combine a modem and wireless router. If that box already broadcasts Wi-Fi, adding another router requires a little planning.
Gather your new router, its power adapter, an Ethernet cable, and a phone or computer. Keep your ISP’s instructions available. Most connections configure automatically, but some require PPPoE credentials or provider-specific settings.
Connect the Router to the Internet
Step 1: Plug In the Correct Cables
If your modem or ONT can be restarted safely, turn it off first. Connect an Ethernet cable from its LAN or Ethernet output to the new router’s WAN or Internet port. This is often coloured differently from the numbered LAN ports. Connect the router’s supplied power adapter.
If your internet device is already a combined modem-router, check whether bridge mode or access-point mode is appropriate before connecting a second router. Running two routers without planning can create double NAT, sometimes interfering with gaming or remote access.
Step 2: Check the Indicator Lights
Start the modem or ONT first, then power on the router once the internet equipment is ready. Give each device time to start. Consult its manual to interpret the power, WAN, and Wi-Fi lights; their colours vary by manufacturer.
Open the Router’s Setup Screen
Step 3: Connect Your Phone or Computer
Join the temporary Wi-Fi network printed on the router’s label, or connect a computer to a LAN port using Ethernet. Open the manufacturer’s official app or enter the setup address from its manual in a browser. Addresses such as 192.168.1.1 and 192.168.0.1 are common examples, not guaranteed defaults.
Follow the setup wizard and create a strong administrator password. This password protects the router’s controls and should differ from your Wi-Fi password. If an account is required, use the manufacturer’s official service.
Step 4: Select the Internet Connection Type
Many cable and fibre services work with automatic IP or DHCP. Choose PPPoE only if your ISP supplies that connection type and its login details. If the router cannot get online, check the WAN cable and any activation instructions rather than guessing at advanced settings.
Set Up Your Wireless Network
Step 5: Name Your Wi-Fi
The network name, or SSID, is what appears on phones and laptops. Choose something recognisable that does not reveal your address or full name. For example, MapleHome is more private than a name containing your street and apartment number. After saving, reconnect to the new network if your phone disconnects.
Step 6: Choose Security and a Password
Use WPA3-Personal when all devices support it. WPA2-Personal with AES remains suitable for older equipment; a WPA2/WPA3 mixed option may help a household using both. Avoid WEP, outdated WPA-only settings, and open Wi-Fi. Choose a long, unique passphrase, ideally several unrelated words, and store it securely.
The Wi-Fi password lets devices join the network. The administrator password changes router settings. Keeping them separate matters: a guest who knows the wireless password should not automatically control your router.
Step 7: Review the Wi-Fi Bands
Many routers offer 2.4 GHz and 5 GHz, with some newer models adding 6 GHz. The 2.4 GHz band usually provides longer reach but faces more interference. The 5 GHz band often performs better at shorter distances, while 6 GHz requires compatible devices. Automatic band steering is a good default. A guide to 2.4 GHz versus 5 GHz Wi-Fi can explain these differences in more detail.
Secure the Router and Improve Coverage
Step 8: Install Updates and Check Optional Features
Open the firmware update screen and enable automatic security updates where available. Leave the built-in firewall enabled. Disable remote administration from the internet and Wi-Fi Protected Setup (WPS) if you do not need them. A guest network can separate visitors from your main devices, particularly when guest isolation is supported.
Step 9: Find a Sensible Location
Position the router in an open, central area, away from metal cabinets and large obstacles. For example, if the modem is in a front bedroom but everyone streams in the back living room, a longer Ethernet cable may allow a better router location. Test before buying extra hardware. For persistent dead zones, see a guide to improving Wi-Fi coverage at home.
Test Your Internet and Troubleshoot
Step 10: Test Near and Far
Connect a phone to the new Wi-Fi, load a website, and repeat on another device. Test beside the router and in your most-used room. If possible, compare a wired speed test with a Wi-Fi speed test. This helps distinguish an ISP problem from weak wireless coverage.
Remember that connecting to Wi-Fi does not prove the internet is working. If devices join but websites will not load, inspect the router’s WAN status, the modem or ONT, and the ISP connection. If the SSID is missing, check that wireless broadcasting is enabled and that your device supports the selected band and security mode. A guide to fixing Wi-Fi connected without internet may help with stubborn faults.
Frequently Asked Questions
Can I set up a wireless router using only my phone?
Usually, yes. Many models provide a smartphone setup app or a mobile-friendly configuration page. Connect to the router’s temporary Wi-Fi and follow the manufacturer’s directions.
Do I need a modem and a wireless router?
It depends on your service. Cable, DSL, and fibre need suitable connection equipment, but your ISP may provide it or combine functions in one device. A standalone router cannot replace every modem or ONT.
Why does my Wi-Fi work but the internet does not?
Wi-Fi is the local connection between your device and router. Internet access depends on the separate WAN connection, which may fail because of loose cables, an ISP outage, activation, or incorrect settings.
Can I reuse my old Wi-Fi network name?
Yes. Devices may reconnect automatically if the name, password, and compatible security settings match. If they do not, forget the saved network on the device and connect again.
Conclusion
Reliable router setup begins with the correct WAN connection and ISP settings, then a secure Wi-Fi name and password. Finish by updating firmware and testing coverage where you actually use the internet. Those few checks give your home network a stronger foundation and make future troubleshooting much easier.